Access Control
Outline 📋
In this chapter, we learn about
- Two-factor Authentication, or 2FA, for Git repositories
- Signing commits
- verifying commits
- Establishing branch protection rules
We also encourage you to explore the links throughout the text, the Do-It-Yourself tasks, as well as the resources listed in the references.
Access Control and 2FA
Git is an excellent tool for source-code management. However, it does not provide access control by default. A repository may have private or public visibility, but it does not implement any authentication on its own. Access control is done to ensure that only assigned developers can read and write to it. Some examples of this include the use of git-daemon to provide read-only (anonymous) access, or the requirement of using SSH keys to push code into the repository. Users without the appropriate SSH key do not have push access to the repository.
Moreover, a simple step for improving the security of a repository further is to introduce Two-Factor Authentication (2FA) when logging in to a Git account. 2FA effectively requires the user to present two pieces of information to authenticate themselves (e.g., knowledge, through a password, and possession, through a phone that receives a one-time password). This raises the difficulty of compromising an account and gaining access to critical code. GitHub provides a detailed guide on how to configure 2FA, or recover an account. Accessing the account can be straightforward through the web, or through the command line using SSH.
Signing Commits
Another useful service that Git allows through the use of SSH keys is the possibility to sign code that is pushed to a repository. This ensures that all commits are authenticated, and the developer responsible for the code can be attributed. In order for a commit to be signed, the public key must be added to the user’s account; the procedure is similar to adding a key for authenticating to GitHub.
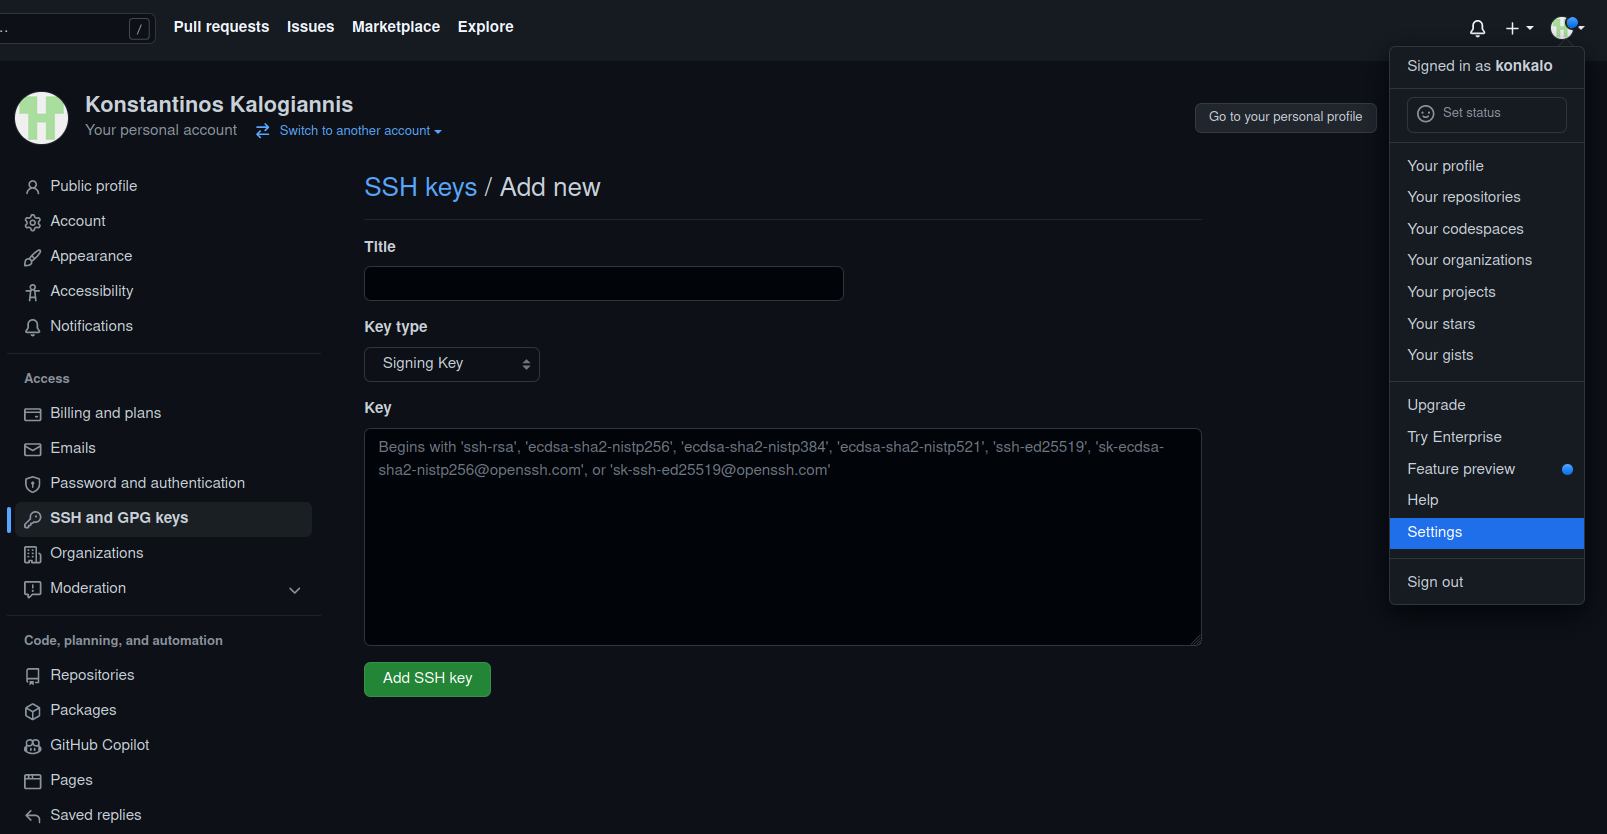
The following lines enable code signing from the command line (instructions), assuming that SSH keys have already been created, e.g., for accessing the repository (SSH key generation, SSH access).
git config commit.gpgsign true
git config gpg.format ssh //when using SSH key instead of GPG
git config user.signingkey "public_key"
More information on the proccess of signing commits can be found in the signing commits section on GitHub.
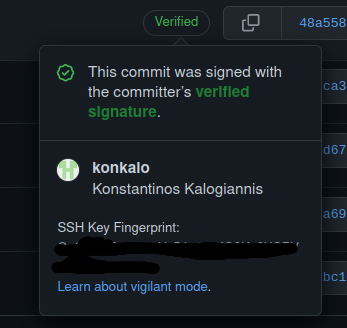
Verifying Commits
There are two ways to verify that a commit was signed with a valid key. The most straightfoward option is to visually inspect if the commit has a Verified icon next to it in the web interface as shown below.
For a command-line option, Git needs to be configured in order to check against the provided public keys. The file must contain at least one principal (e.g., user1@example.com), followed by the associated public key in a single line. The following commands show the steps required to achieve this.
git config gpg.ssh.allowedSignersFile <file>
git verify-commit -v <commit>
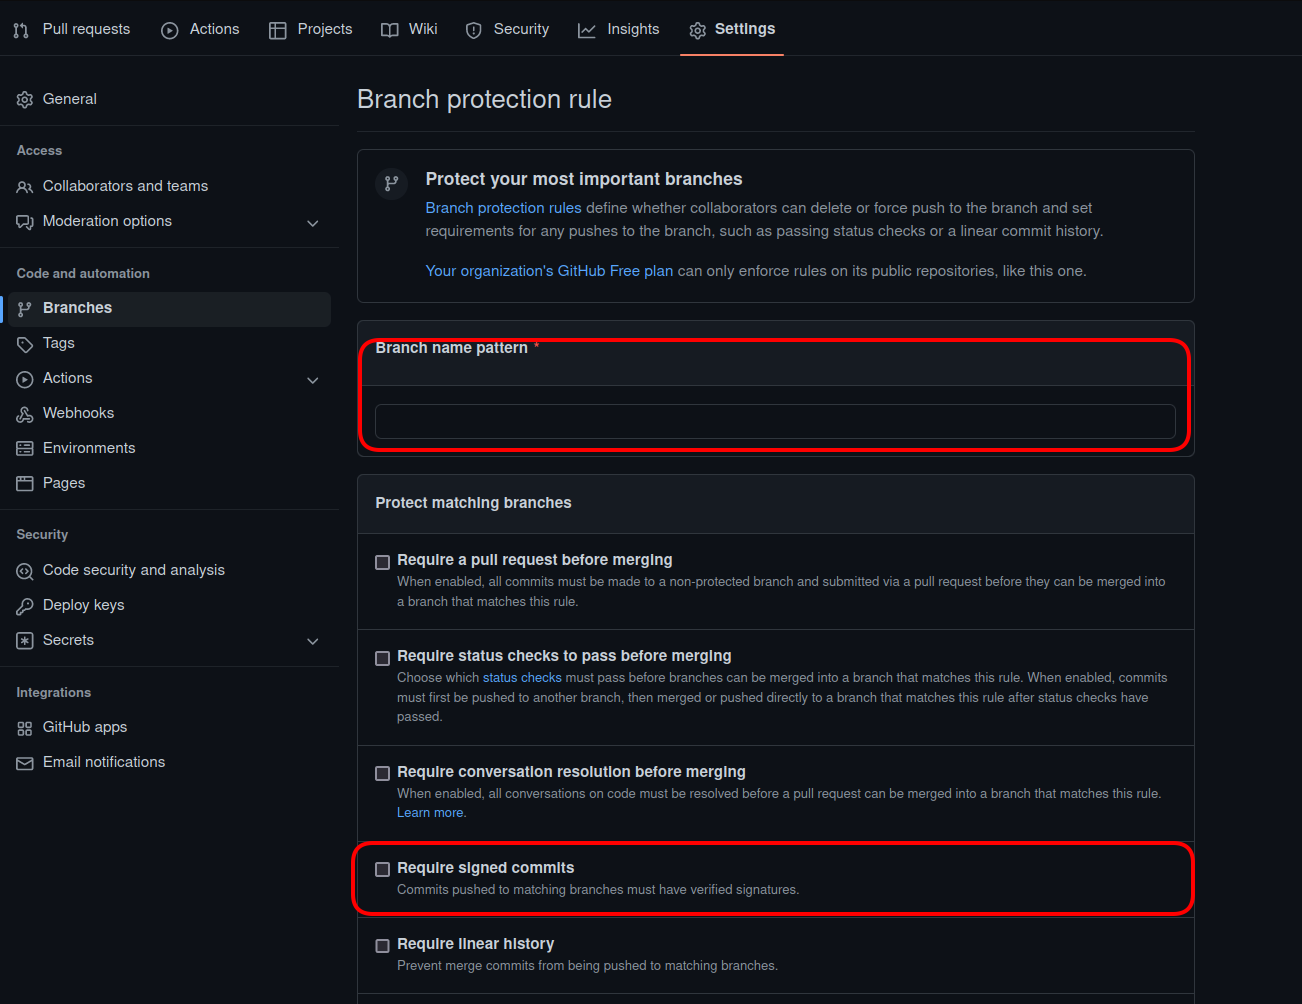
Branch Protection Rules
Apart from restricting access to the code base, GitHub also provides protection rules that can be applied in order to restrict possible actions by unauthorized users, such as pull requests or merges. For example, GitHub allows repository administrators to require pull requests for all branches that contain the word release in their name; or, that pull requests that affect other developers’ code must be first approved by the code owner.
The relevant interface is shown below. More information about this proccess can be found in branch protection rules.
DIY
Novice 👾
- Create a new GitHub repository
- Perform the following functions: clone, commit, merge, push, pull request
- Create access
SSHkeys and assign them to your GitHub account - Create signing
SSHorgpgkeys and attach them to your GitHub account - Sign a commit
Expert 💯
- Configure branch rules for your repository on GitHub to restrict access
- Set up and enable 2FA functionality in your GitHub account